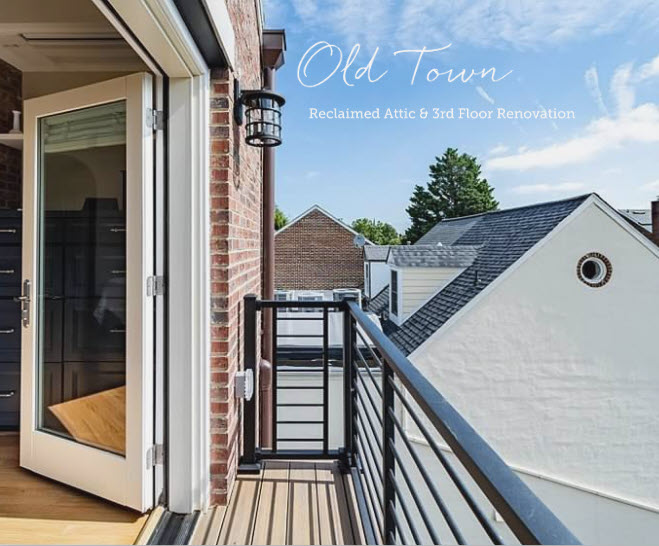
“Moore Construction Group did an amazing job on our recent third floor remodeling project. Moore worked with us throughout the entire process – from the initial idea of expanding our third floor; the planning, design, and permitting; the 6-month construction; and through the finishing touches of the project.
In addition to the excellent work performed, Moore was friendly, neat, professional, attentive, and in constant communication with us throughout the entire project. As with any major project, there were inevitable challenges, but Moore handled each obstacle with professionalism and full transparency.
We certainly recommend Moore to anyone seeking a reliable, professional, and talented team for their construction project.
Thank you, Moore, for turning our vision into reality and for creating a space that will undoubtedly be enjoyed and appreciated for many years to come!”
Sincerely,
Chantele & Stephen
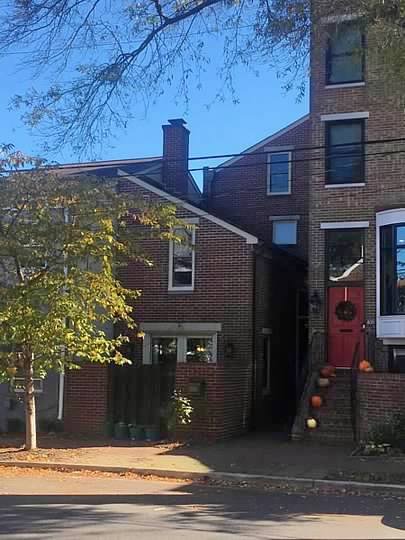
Located in Old Town Alexandria, this 1980’s townhome sits nestled on a quiet street. Its sloped roofline offers a unique mid-century modern take on colonial townhouses. Unfortunately, the roofline created a cramped floor plan for the 3rd floor and attic space that was not being utilized to its full potential. In a town where every square inch matters, the owners came to us wanting to investigate design options to recapture the attic space and create a layout that was more functional for their family.
The existing 3rd floor consisted of 2 tight but legal bedrooms due to the width of the townhome and the sloped ceiling height. The entire left side of the plan was either dead space or tight storage in which bins were tucked away and hard to get to. The bathroom was also extremely cramped, being tucked into the sloped roofline. By raising the roof, the entire floor would be able to become usable square footage. The original goal was to create a primary suite with closet space and a double vanity while also maintaining a playroom or future office, so during Schematic design, we created 3 different layouts that explored varying budgets and concepts.
Schematic Design 1 was the most budget-conscious option, keeping the new bathroom where most of the existing plumbing was already located. This plan kept the playroom at the front and the primary bedroom toward the back. This plan couldn’t create a true primary suite, but it served as a good baseline for budgeting.
SD2 switched the bedroom to the front, which enabled the hallway to be completely private, creating a true suite with a walk-in closet and the option for additional reach-in closet space by the stairs. A roomy playroom with plenty of storage was located in the back.
SD3 was the most drastic change, as it removed the playroom from the scope and created a full-floor primary suite. This plan also completely relocated the bathroom to the front of the house, which opened up the middle for storage while also acting as a separation from the large rear bedroom, complete with a Juliet balcony. This ended up being the favorite approach, and it continued to the next phase for further refinement. During Design Development, the bathroom was rearranged per personal preferences, and closets were moved to create an in-home office space. Finish details like built-ins, trim, flooring, tile, light fixtures and accessories were also flushed out before construction began.
Removing tile, fixtures, and flooring and knocking down walls opens up the 3rd floor for the real work to begin. Working on the 3rd floor of a townhome sandwiched between neighbors adds a few steps to removing debris. Our crew carefully bagged debris and carried them down the two floors to the dumpster below in order to avoid accidentally getting trash in the neighboring yards by tossing everything down from the rooftop. Working in tight spaces can be tedious but our crews are experienced in working in spaces such as this.
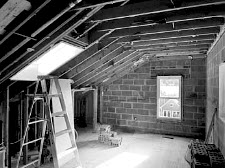
Once the old roofline was removed and the extension of the brick exterior side wall was complete (see photo to left), framing between the now equal side walls could commence. These photos do an amazing job highlighting the difference between the original sloped roof and the framing of the new one. One can already feel the additional elbow room!
Once all of the addition is framed and watertight, it’s off to the races with roughing in the utilities. This is normally the most technical part of the job, as the crews are running electrical, plumbing, mechanical, and sometimes gas through the walls, ceiling, and floors while making sure to adhere to all safety codes and leaving room for other utilities to get where they need to go. The picture to the top left shows plumbing for the new primary bathroom being run through the floor joists. So as not to compromise the floor’s structural integrity, the joists can only be cut in certain areas in order to run the needed pipes. Wires, light housing, outlets and light switch boxes are installed throughout based on the previously discussed plans. Specialty framing is also finalized during this time, as you can see in the fireplace framing to the left and the arched doorway above. Shower pans, niches, and recessed mirrors are prepped and ready for rough-ins to pass inspection and for drywall to begin!
The installation of drywall feels like the turning point of any project. Demolition is a scary leap into the unknown, and rough-ins can be time-consuming and stressful as it can be hard to visualize how everything will come into place. However, once drywall comes in, everything starts to feel like it’s coming together. Somehow, encasing the framing makes spaces feel larger than they felt before. This is also the point in the project where all the fun finishes the owners worked with our designers on are installed. Trim work, paint, tile, and flooring quickly work to finish off the space with light fixtures, hardware, and bathroom accessories to follow.
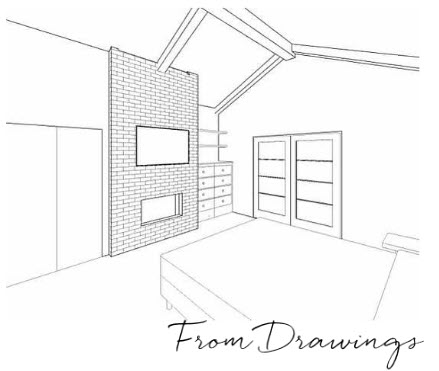
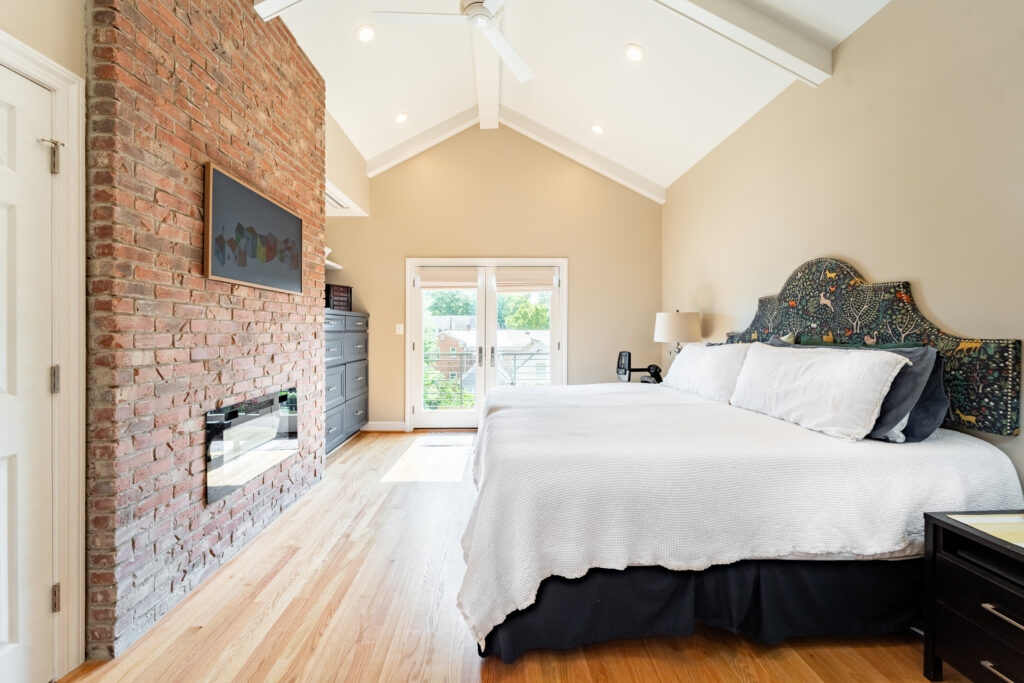
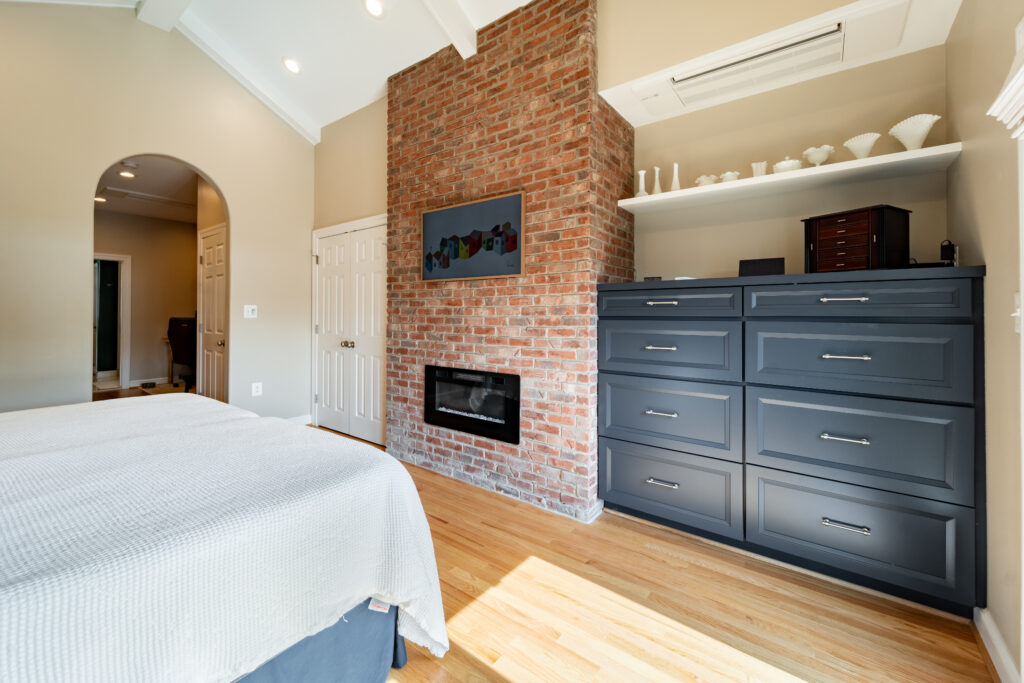
During the Design Development process, our designers work to create elevations and 3-dimensional drawings to help homeowners visualize their future spaces and finalize any decisions they need to make. This process normally takes some back and forth as details get more refined. Sometimes even after plans are finalized on paper, unforeseen field conditions may cause plans to shift slightly once construction starts. You can see by this side by side that almost every detail matches the initial drawing, however the ceiling was unable to house HVAC as planned, so the team worked with the homeowners to build the air conditioning into a new bulkhead above their built-in dresser and shelves. This kept the unit hidden and recessed without disrupting the overall feel of the room.
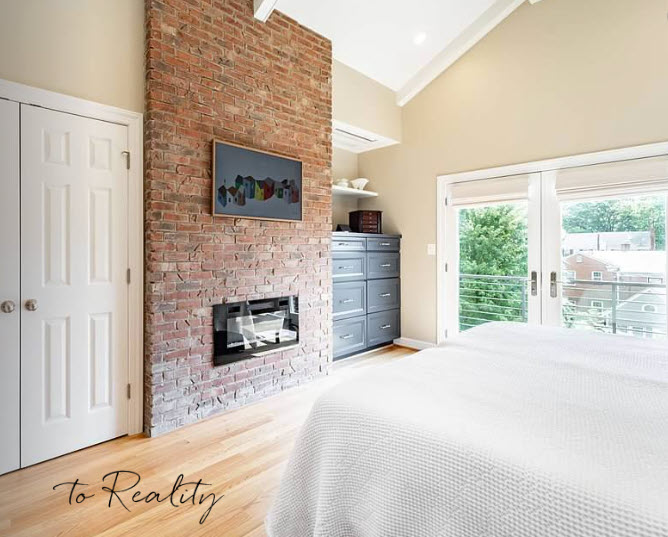
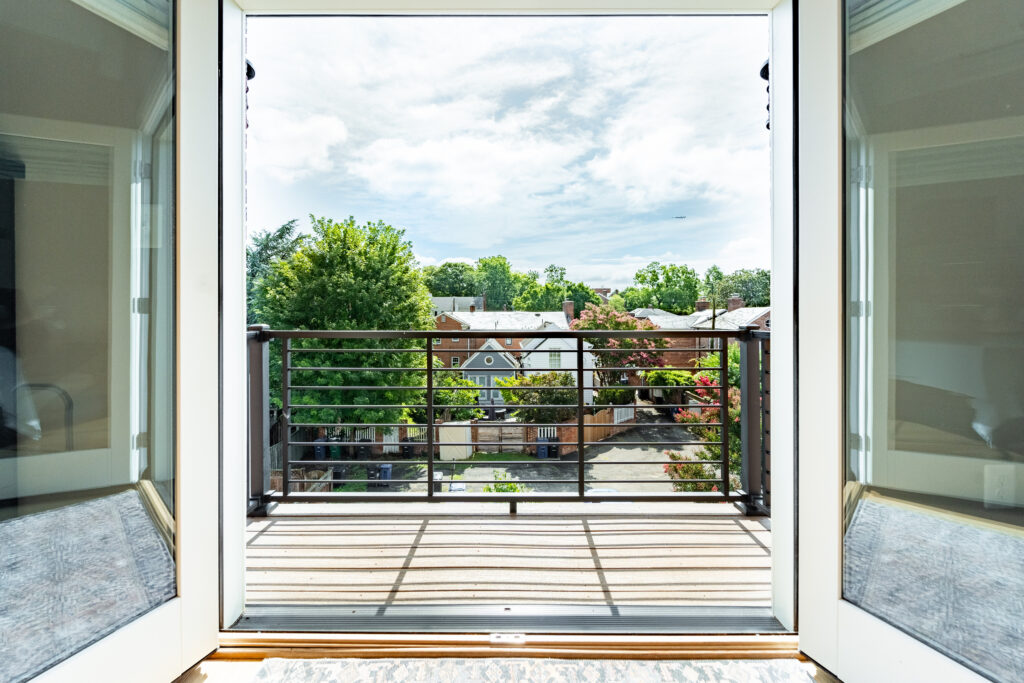
The photo to the right shows how small and cramped the back playroom used to be, even with the interior demolished. Not large enough to house a king-sized bed, let alone feel luxurious. By changing the roofline and gaining 3.5′ of lost floor space, this room transformed into a wonderful primary bedroom. Double doors and a step-out balcony were added to pull in the beautiful views of Old Town and brighten up the space with another unique touch.
With many townhomes the hardest part about the design is creating access to all spaces without creating long, narrow hallways that take up precious square footage. With the final plan utilizing the entire 3rd floor as a primary suite, the staircase was walled off and a spacious hall with storage closets was added.
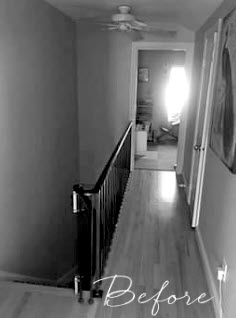
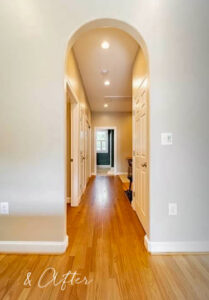
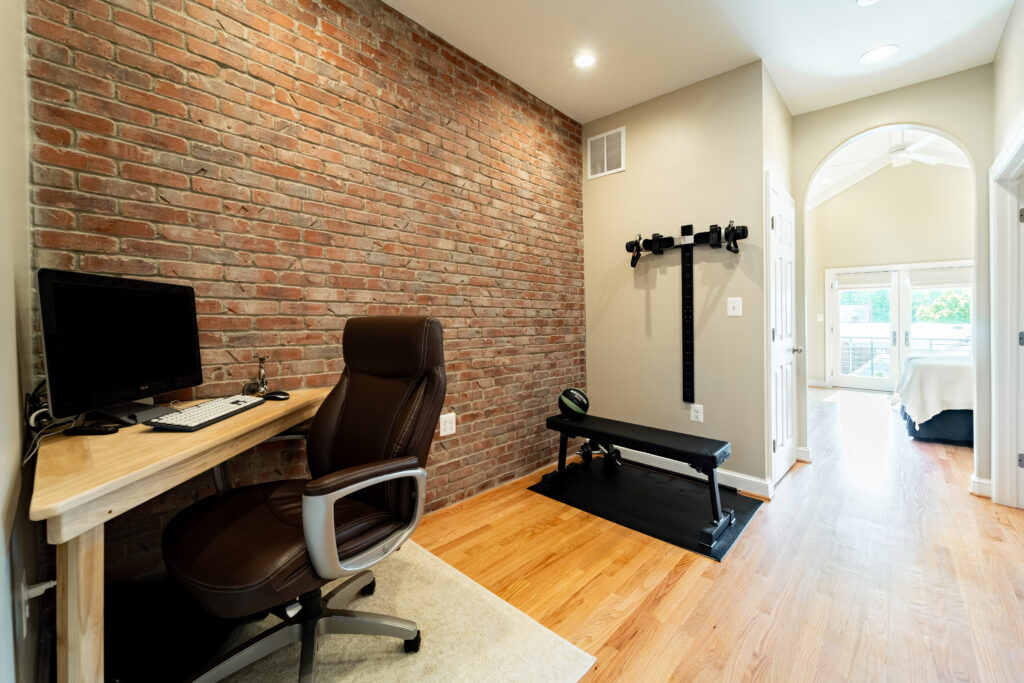
A multipurpose area became part of the new hall that connects the bedroom to the bathroom, keeping it from feeling long and narrow. This space could have become a large walk-in closet, but the homeowners opted to create an at-home office and gym space. This is a huge trend stemming from the 2020 Covid Pandemic, causing many clients to look into creating better spaces for remote work.
The bedroom was connected but visually separated from the other spaces by adding a beautiful arched opening. This is an easy way to designate spaces while also adding unique finishing touches that are far from builder grade.
This bathroom is a beautiful blend of classic touches with contemporary lines. From the pedestal porcelain sinks and the brushed nickel fixtures to the deep, bold colors of the walls, this transitional primary bathroom boasts old town luxury and charm.
This bathroom has his and hers sinks, a private toilet, and a large walk-in shower with a double shower head, niches, and a shaving ledge. Through the archway, there is also an additional storage closet and a stacked laundry unit. This was much more convenient location for laundry than walking up and down to the first floor for each load.
Porcelain marble look tile creates the elevated look of marble without the upkeep and yellowing over time. Utilizing different sizes and patterns of the tile creates spaces with different textures and interests.
The window seen in the picture was existing but recently updated. Our crew was able to remove it and reinstall it centered on the new roofline so that it worked well with the exterior elevation as well as the new bathroom layout. Details such as this are great examples of the benefits of planning your project with a Design Build.
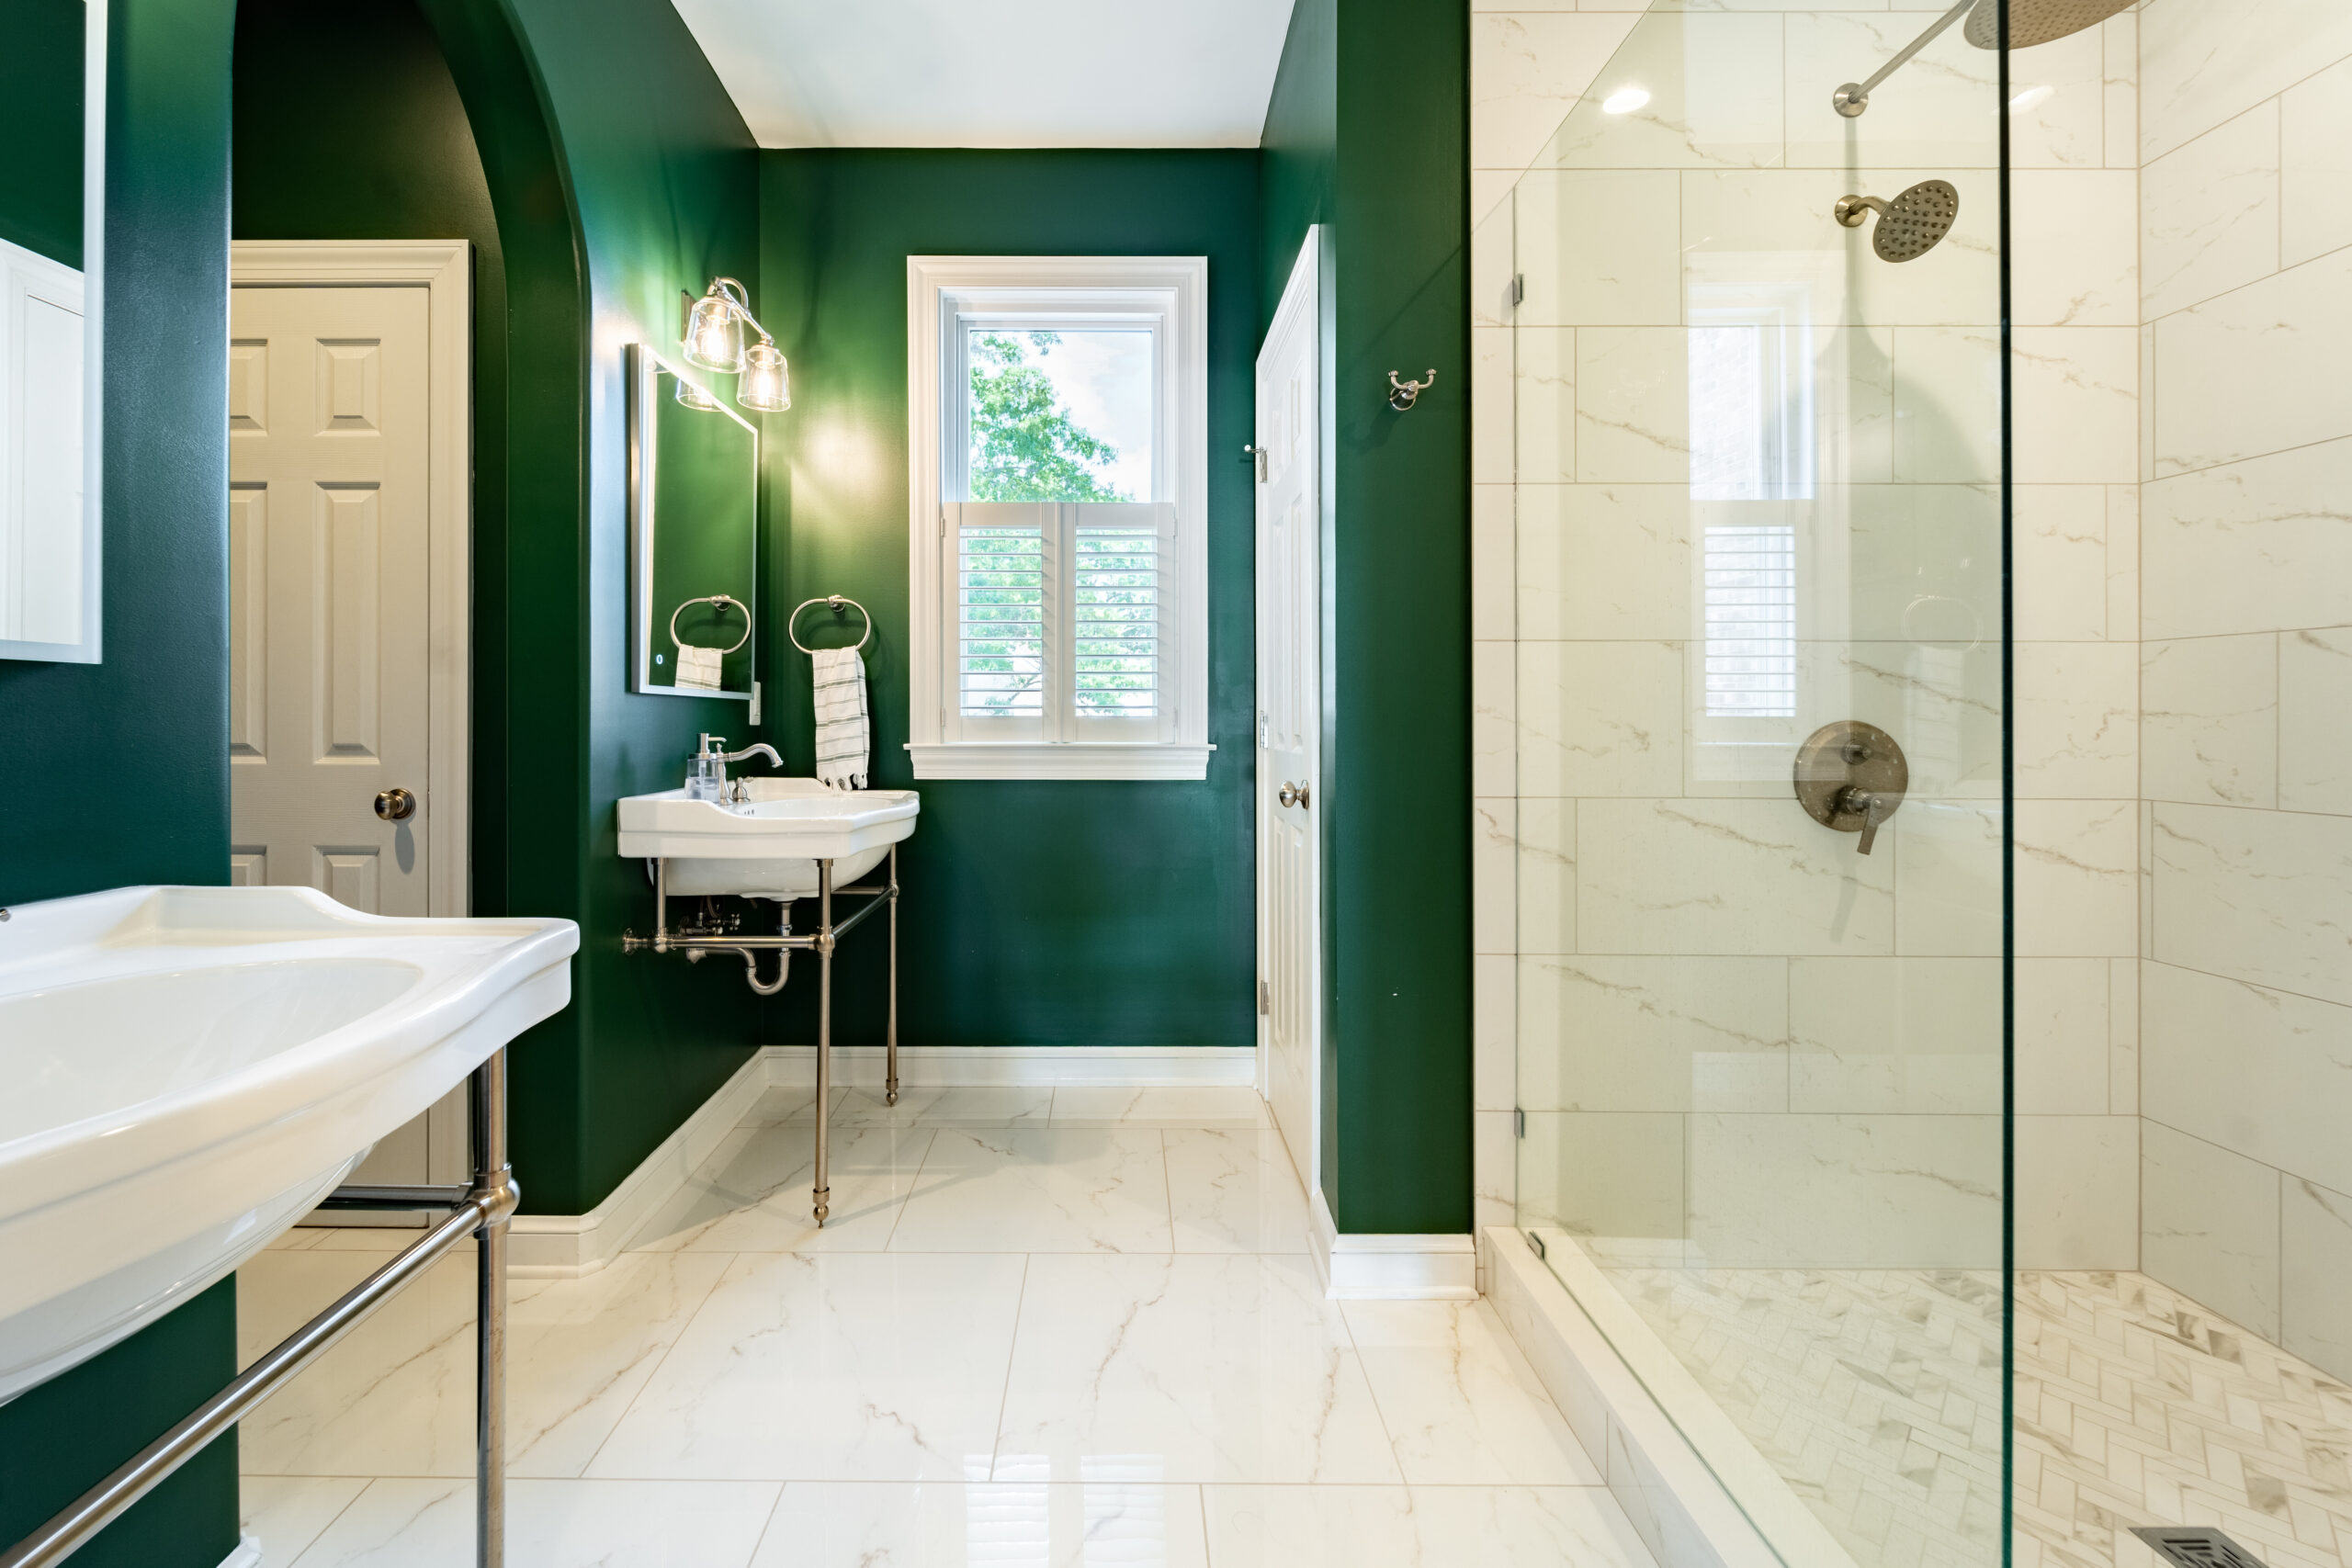
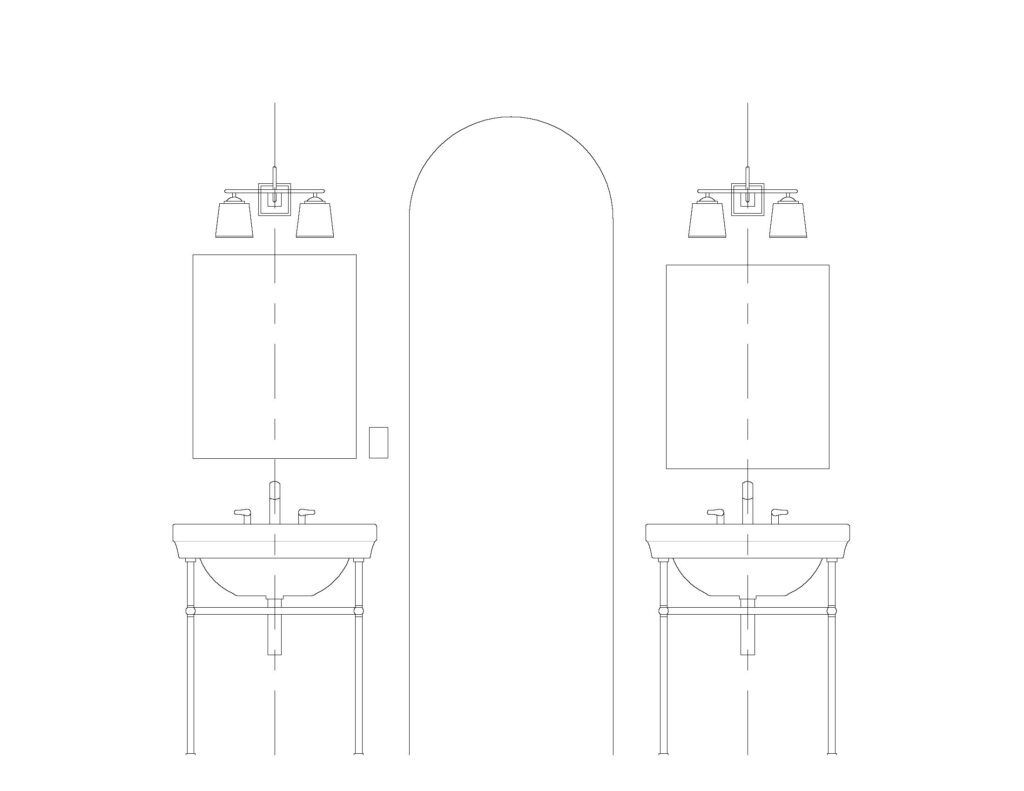
Drawings are priceless when it comes to planning and finalizing fixtures. We could see exactly how these sinks would look with the chosen light fixtures and mirrors and discuss spacing. Our crews will also confirm heights for towel bars and such with clients, making sure they are at comfortable heights for their personal use.
The double niche at the shower is detailed with trim to match the shower fixtures and accent tile matching the shower floor. Niches add interest to a shower while also creating easy storage.
No one ever complains about having too much storage, especially in a townhome. Storage is so much more than mere closets. It can be used to help divide spaces, offer sound deadening, and fill in gaps that help complete a floor plan.
This Primary suite utilized a vast array of storage options:
~Linen Closet
~Mechanical Closet
~His and Her reach in closets
~Customized built-ins with a cabinet brand of choice
~Built-in Shelves
~Laundry and Utility Closet
The double niche at the shower is detailed with trim to match the shower fixtures and accent tile matching the shower floor. Niches add interest to a shower while also creating easy storage.